April 9-12
I just returned from a four day trip skiing along the Teton Crest trail. We started the trip at Teton Pass at the base of Mount Glory, and 4 days later, came out Cascade Canyon. It was one of the best ski trips I’ve ever been on. Scenery was fantastic and we had perfect weather for the trip.
This was my fourth attempt on this route. The first attempt, we never even got to the Tetons, as I rolled my car on I-80 in southern Wyoming in a storm. The second attempt, my partner broke his ski binding 2 hours into the trip. The third attempt, I ripped my ski binding out of my ski at the end of the first day.
After trying to get it done so many times, it was great to finally get to ski the whole route. We had a great time. After we left Mount Glory, we didn’t see anyone else the whole time. It ranks as one of my favorite backcountry experiences.
What follows is a brief summary of the route, along with some (hopefully) helpful information for anyone else who is interested in skiing this amazing route.
Right Click and “save link” to download a Google Earth Track of our trip.
Unfortunately, the road to Jenny Lake doesn’t open until May 1st, so you have to park at Taggart Lake. This means that at the end of the trip you’ve got to hike from Jenny Lake to Taggart Lake. Because we would be leaving our car at the Taggart Lake parking lot for 4 days, we stopped in at the Park Visitor’s Center (open at 9:00) to let them know we would be leaving the car in the Taggart parking lot for 4 days.
A note on regulations: If you are going to sleep inside the Park boundaries, you need to get a backcountry permit from the Park, available at the Visitor’s Center. We didn’t plan on sleeping inside the Park, so we didn’t bother with a permit. If you do get a permit, you may also be required to get a bear canister. However, if you are going to sleep above 10,000 feet, a bear canister is not required. It’s easy to find campsites outside of the park boundaries and/or above 10,000 feet, so I would recommend not carrying a bear canister. No bear in its right might is going to be messing around in deep snow at high elevation, so it’s not worth carrying the extra weight.
We dropped our car at the Taggart Lake parking lot, and used a taxi to take us to Teton Pass, where the trip starts. For the shuttle, we used Drop Horn Taxi. They were great. He arrived early, and charged us $85 to take the five of us from Taggart Lake parking lot to Teton Pass.
From Teton Pass, it was a long grind up to the top of Mount Glory. The snow was crusty and the angle steep, so we booted up a well-worn boot track instead of skinning.

From the top of Mount Glory, we were treated to beautiful views. After a brief rest, we took off, following the ridge crest curving around to the left. The route generally follows the wilderness boundary north. Generally, the easiest route stays just a bit back from the edge of the ridge. Eventually, we dropped down off of the ridge for a long, open run to Phillips Pass. We saw some snowmobile tracks here, but no snowmobiles. The drop down to Phillips Pass was our first chance for some actual downhill skiing, and we enjoyed some turns in mashed-potato snow.
At Phillips Pass, we contoured down into the Moose Creek drainage. We traded altitude for distance, slowly dropping down as we picked our way through trees, cliffs and gullies as we headed north up the drainage. Eventually, we dropped all the way down to the East bank of Moose Creek, and skinned our way up the gently sloping, open track.

We’d already had a pretty long day, as we had left Salt Lake at 2:00 a.m. to get to Jackson that morning. We were all pretty tired, so we decided to make camp at the top of the Moose Creek drainage. We found a nice spot with easy access to the creek for water. We spent a pleasant night. It was calm, beautiful, and not too cold.

Next morning began with a steep climb up and over the pass into Granite basin. After getting up over the ridge, we more of less followed the summer trail along the gentle Middle Fork of Granite Basin, then into the steeper North Fork. At the North Fork, part of our party dropped down North East into the drainage, while two of us contoured West up to the head of the drainage, which connected with two benches on the North side of the drainage, passing the frozen Marion Lake along the way. We joined up just above Marion lake.

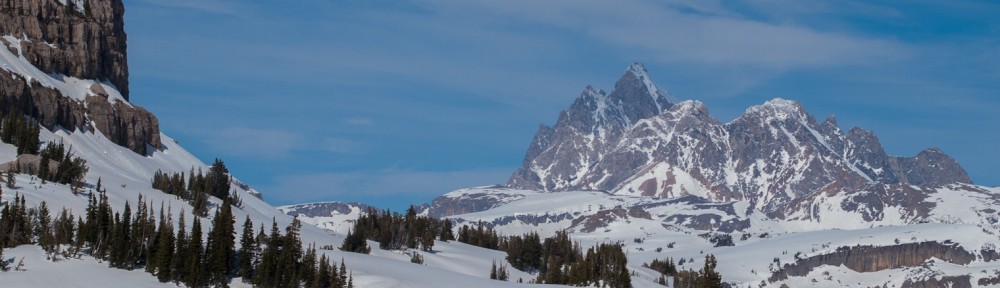
We stopped for lunch on a ridge line just before the drop down into the wide open plateau, with Spearhead Peak to the North East, and the Grand Teton looming to the North. This broad expanse seemed more like a huge glacier in Alaska than something in the Western wilderness. The vistas were simply breathtaking in every direction. We kept heading North, passing below Spearhead peak, moving slowly closer to the Grand Teton, which loomed to the North.


We finally pulled up onto the Death Canyon Shelf, and followed it for a while. It was getting late in the day, so we decided to look for a camp site. We found a beautiful sheltered spot on the Death Canyon Shelf. We were treated to gorgeous evening light on the Grand Teton as the sun set.

The next day was probably the most difficult on the trip, primarily because of some route finding choices. (Note that I’m not admitting that we got lost, just saying that we may have chosen a path that was not the easiest.) At first, it was pretty straight forward, as we just followed the Death Canyon Shelf along to Mount Meek pass. At this point, however, we were lured East by some skier tracks from a party that had passed this way some time earlier. So, when we got to the ridge above Alaska Basin, we were too far East to see the Sheep Steps which lead down into Alaska Basin. To the West of us, where the Sheep Steps should be, all we could see was a long line of cliffs, with no apparent way down.
The ski tracks that we had followed went East, off of a steep face dropping down toward Death Canyon, then contoured North under Buck Mountain toward Veiled Peak. We decided to follow the tracks and cross Alaska Basin on benches along the Basin’s North side. Dropping down off of the plateau was more exciting than I would have liked, as it involved skiing down a rather steep face with cliff bands below. A fall here would have very unpleasant consequences. I locked out the release on my bindings, and carefully skied down the face, following my friends’ tracks.

We contoured North East, then North West, following a high bench on the North side of Alaska Basin. Eventually, we got to a point where we could see the South side of the basin clearly, and we saw the obvious weakness in the cliff bands that was the Sheep Steps, West of where we had been. We then realized that if we’d just kept going West along the ridgeline, we’d have been able to drop down into the basin relatively easily rather than skiing the steep cliffy band we’d negotiated.
The climb up to Hurricane Pass was a long slog with some steep climbing to get up out of Alaska Basin. We had a bit of urgency because our calm blue skies had been displaced with clouds and wind. As we approached the pass, the sky was darkening, and we were keen to get over the pass and down into Cascade Canyon before the storm hit us.

When we reached Hurricane Pass, the wind was blowing strong, giving us an incentive to get down off of the pass as quickly as possible. However, the slope on the North side of the pass was pretty steep. I didn’t measure it, but it felt like 50 degrees. My friends disappeared over the edge one by one, and finally it was me (the worst skier of the group) who was left to descend the slope. It took me a while to get up the courage to commit to the slope, but ultimately, when I finally decided to just ski it, it all went well.
With the weather changing for the worse, we made camp just below the pass. We spent more than usual care pitching the tents and making sure our camp was secure, as the winds were already rising. That night, the winds blew heavily. It started raining, then the rain turned to snow. Between winds that were shaking our tent walls, and heavy snow that kept collapsing the tent edges in on us, nobody got much sleep. We woke up to a bit of a blizzard, with limited visibility and high winds. We didn’t bother with breakfast. We just threw our stuff in our packs and started skiing down the canyon.

The skiing was fantastic. Up until this point, we hadn’t really enjoyed any great skiing, but with 5 or 6 inches of fresh snow, the descent down the South Fork of Cascade Canyon was a lot of fun, with everyone swooping down the slopes, yelling with delight. We alternated between skiing down the stream bed and staying just to the left of it. Eventually, as we dropped down further, the stream bed became narrower, and we stayed left and higher up in the trees. We must have been following the summer trail, because when we finally reached the junction with the main branch of Cascade Canyon, we ran right into the bridge across the creek.
In contrast to our quick ski descent down the steeper South Fork, the main Cascade Canyon was a gently sloped, slow slog out. It took us longer than anyone thought it would to finally reach Jenny Lake at the mouth of Cascade Canyon. Luckily, there was some pretty scenery for us to marvel at on the way out, including trees laden with fresh snow and Spanish moss.

By this point, I was pretty tired. I’d skipped breakfast because of the nasty weather, and had only eaten an energy bar all day long. The slow slog around Jenny Lake seemed to just go on and on without end. When we finally reached the end of the skiing and got to the road, I was exhausted. Because my feet were hurting, I took off my boots and made the hike from Jenny Lake to Taggert Lake in my socks. It wasn’t ideal, but it felt so good to get my boots off of my blistered feet.
It felt amazing to finally see the parking lot with our car there. We celebrated our trip with a dinner at Wendy’s and then drove home.


This trip was one of the best in my life. It was a perfect combination of challenge, good friends, good conditions, and amazing scenery.
Here is a list of the gear I took on the trip. At the beginning of the trip, my pack weighed 28 pounds, including 2.5 liters of water.
Teton Crest Ski Tour Gear
Clothing
Mammut All-Year base layer top
Craft boxer briefs with wind panel
REI Activestretch running pants
Black Diamond A/T gaiters
Marmot Pre-cip full zip pants
Mountain Hardwear Quasar pullover
Mountain Hardwear hooded Compressor jacket
Loki pile hat
Buff headband
Outdoor Research Sun Runner cap
2 pair Dahlgren ski socks
Dynafit “TLT-5P” boots
Rab phantom grip gloves
Outdoor Research Supercouloir gloves
Personal Gear
Kelty Cloud 60 liter backpack
Adidas Terrex Pro sunglasses
MSR Hydromedary 2.5 liter water bag
Mammut Lucido TX1 headlamp 4.9
Suunto Vector altimeter watch 2
Sunscreen in 1 oz squeeze bottle
Casio Commando Android cell phone
4 paper towels .7
Hand sanitizer (1/2 ounce)
Toothbrush/paste 1.6
Lighter
Olympus PEN E-P2 camera with 12mm, 20mm, 45mm in Mountainsmith Zoom-S case
Extra camera batteries, lens wipes
Ski Gear
Life Link probe ski poles with powder baskets and self arrest grips
DPS Wailer 99 skis (184cm) with Plum Guide bindings
Powder cords
Mammut Barryvox Avalanche beacon with new batteries
Ortovox Grizzly Folding shovel 21.4
G3 Ski skins
Velcro ski straps for securing skis to pack .8
Personal Camping Gear
Evernew Titanium cup
Titanium Spoon .3
NeoAir All Season sleeping pad
Montbell inflatable pillow
Marmot Helium 15degree sleeping bag with Granite Gear cuben fiber stuffsack
2 Person Group Gear:
Sylnylon pyramid tent with Black Diamond pole adaptor
MSR Reactor stove
Snowpeak titanium bowl
3 Fuel canisters (Should have only brought 2 of these)
Group Gear:
1st aid kit with firestarter, duct tape,
Lighters
Map
Compass
Purple wax, cork, and scraper
Skin Wax
inclinometer
Epoxy, steel wool
Brooks Range Multi Tool
Delorme inReach
Breakfasts
9 oatmeal
Lunches
6 energy gels
6 energy bars
3 packages of pepperoni
Baby Ruth candy bars
Cashews
Dinner
3 freeze dried dinners
6 hot drink mixes
1 gallon ziplock bag (for trash)